

SolidWorks VBA Extrude Feature: Automate Part Creation
SolidWorks VBA Extrude Feature is a powerful tool that allows you to automate the extrusion process in your part designs. With SolidWorks VBA scripting, you can streamline the creation of 3D features, saving time and ensuring consistency in your workflows.
Prerequisites for Automating Extrude in SolidWorks using VBA
Before automating the extrude feature in SolidWorks using VBA, ensure you have SolidWorks installed and running. Additionally, you need to have a default part template configured in SolidWorks. This allows your script to create a new part document without manually selecting a template. It’s also important to have access to the VBA editor within SolidWorks to write and execute your script, which can be accessed by pressing Alt + F11.
Option Explicit
' Define variable to interact with the SolidWorks application
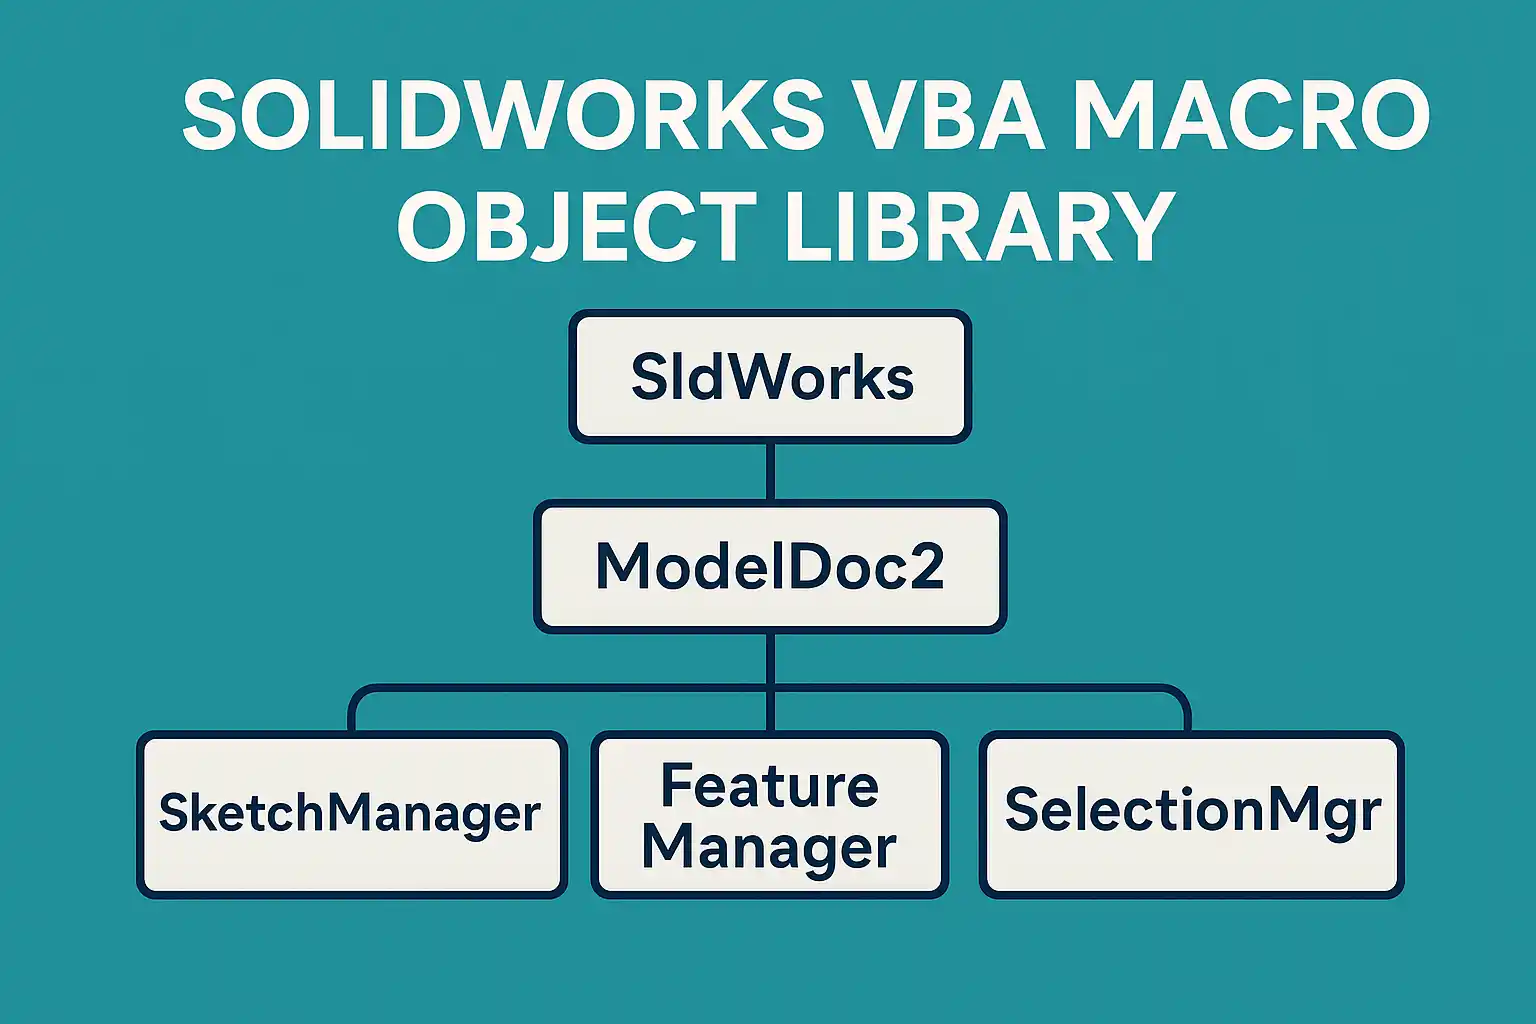
Dim swApp As SldWorks.SldWorks
' Define variable for the active SolidWorks document
Dim swDoc As SldWorks.ModelDoc2
' Define a Boolean variable to store operation status
Dim BoolStatus As Boolean
' Define variable to manage sketches within SolidWorks
Dim swSketchManager As SldWorks.SketchManager
' Define variable to manage features within SolidWorks
Dim swFeature As SldWorks.Feature
' Main subroutine to execute the SolidWorks automation tasks
Sub main()
' Initialize SolidWorks application instance
Set swApp = Application.SldWorks
' Define a string to hold the default part template file location
Dim defaultTemplate As String
' Retrieve the default part template file path from SolidWorks settings
defaultTemplate = swApp.GetUserPreferenceStringValue(swUserPreferenceStringValue_e.swDefaultTemplatePart)
' Create a new part document based on the default template
Set swDoc = swApp.NewDocument(defaultTemplate, 0, 0, 0)
' Select the Front Plane for the sketch creation
BoolStatus = swDoc.Extension.SelectByID2("Front Plane", "PLANE", 0, 0, 0, False, 0, Nothing, swSelectOption_e.swSelectOptionDefault)
' Set up the Sketch Manager for sketch operations
Set swSketchManager = swDoc.SketchManager
' Begin a new sketch on the selected plane
swSketchManager.InsertSketch True
' Define a variable to store the corner rectangle geometry created
Dim vSketchLines As Variant
' Create a corner rectangle shape in the sketch
vSketchLines = swSketchManager.CreateCornerRectangle(0, 1, 0, 1, 0, 0)
' Clear any existing selections in the document
swDoc.ClearSelection2 True
' Fit the sketch view to the screen in the SolidWorks window
swDoc.ViewZoomtofit2
' Exit the sketch mode to proceed with the feature creation
swSketchManager.InsertSketch True
' Create an extrusion feature from the sketch, setting depth and conditions
Set swFeature = swDoc.FeatureManager.FeatureExtrusion3(True, False, False, swEndConditions_e.swEndCondBlind, swEndConditions_e.swEndCondBlind, 2, 0, False, False, False, True, 0, 0, False, False, False, False, True, False, True, swEndConditions_e.swEndCondBlind, 0, False)
End Sub
Prerequisites:
- SolidWorks installed and running.
- Default part template configured in SolidWorks.
- VBA Editor access within SolidWorks (press Alt + F11 to open).
Step-by-Step Process:
- Step 1: Open SolidWorks and Access the VBA Editor
- Open SolidWorks.
- Press Alt + F11 to access the VBA Editor.
- Step 2: Initialize the SolidWorks Application
- Connect your VBA script to SolidWorks by initializing the SolidWorks application object.
- Step 3: Create a New Part Document
- Retrieve the default part template from SolidWorks and create a new part document.
- Step 4: Select the Front Plane
- Select the Front Plane in the part document to start creating a sketch.
- Step 5: Create a Sketch on the Front Plane
- Start a new sketch on the Front Plane and create a shape (e.g., rectangle or circle).
- Step 6: Create the Extrude Feature
- Use SolidWorks’ feature manager to create an extrusion from the sketch, specifying the extrusion depth.
- Step 7: Save the Part Document
- Save the newly created part to a specified file path.
Ready to Automate Your SolidWorks Designs?
Follow these easy steps to automate the extrude feature in SolidWorks using VBA. Start streamlining your 3D modeling process today and save valuable time on repetitive tasks. If you’re looking to dive deeper into SolidWorks automation or need help customizing your script, don’t hesitate to get in touch or check out more tutorials.
Get started now and take your design automation to the next level!
Also read related posts:
- SketchUp for Designers in 2025: 10 Powerful Reasons to use
- ZWCAD MFG: The Smart CAD Solution for Engineers in 2025
- What is BoCAD? 10 Powerful Reasons to use Bocad
- BoCAD: The Ultimate Tekla Alternative for Accurate Steel Detailing (2025)


 1")


 5")